
Secure mode — unlock audio & sensors
Browsers only hand over a microphone or the motion sensors to a page served over a secure (https) connection. On a room Wi-Fi with no internet, ResusSim provides that itself: the host issues its own certificate, and each device agrees to trust it once. Five minutes per device, once ever.
Do you even need this?
No, for most of the room. The monitor, ventilator, EMR, pumps, POCUS and the consult phone's text messaging all work over the ordinary connection. You need Secure mode only for three things:
If none of those are in today's session, skip this page entirely.
Step 1 — turn it on at the host once per room
- On the host computer, open the instructor console and go to Setup.
- Under Advanced · turn on secure features without accounts, click Enable secure mode on this machine.
- That's it. The host now also serves at https://<host-address>:4443, and every pairing QR code switches to the secure address automatically.
The certificate covers the host's current network addresses. If the host later joins a different Wi-Fi, secure mode re-issues it automatically — devices keep their trust; just re-scan the QR.
iPhone & iPad iOS / iPadOS
Two parts: install the profile, then trust it. The second part is the one everyone misses — without it, everything looks installed but sensors stay silently blocked.
- In Safari — it must be Safari, Chrome cannot install profiles — open
http://<host-address>:4000/api/tls/ca.mobileconfig
and tap Allow on the download prompt.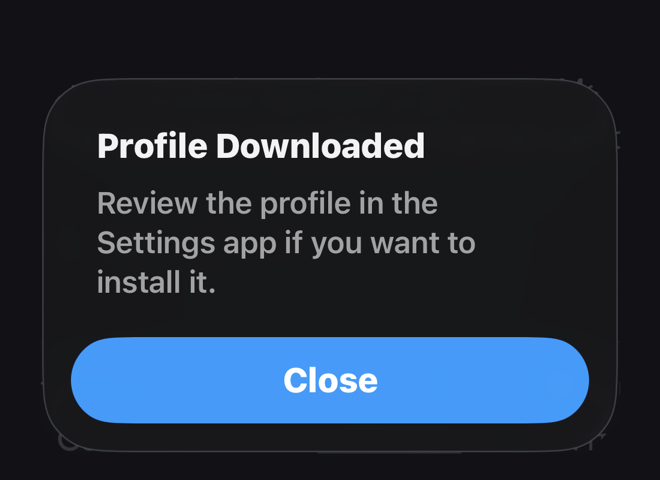
iOS confirms the download. Tap Close, then continue in Settings. - Open Settings → General → VPN & Device Management. Under Configuration Profile, tap ResusSim Local CA → Install → passcode → Install again on the "unsigned profile" warning → Done.
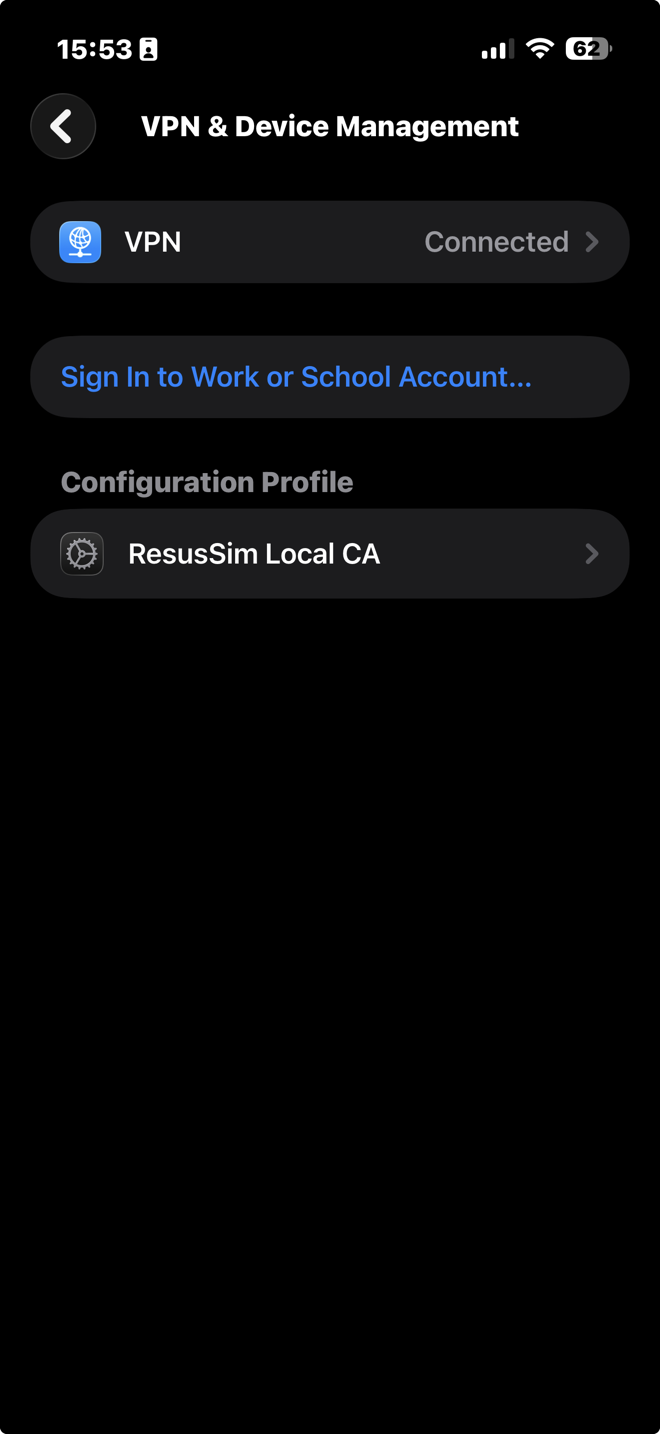
The profile appears under VPN & Device Management. The "not signed" warning is expected — you generated this certificate yourself. - The step everyone forgets: Settings → General → About → Certificate Trust Settings → switch ResusSim Local CA on → Continue.
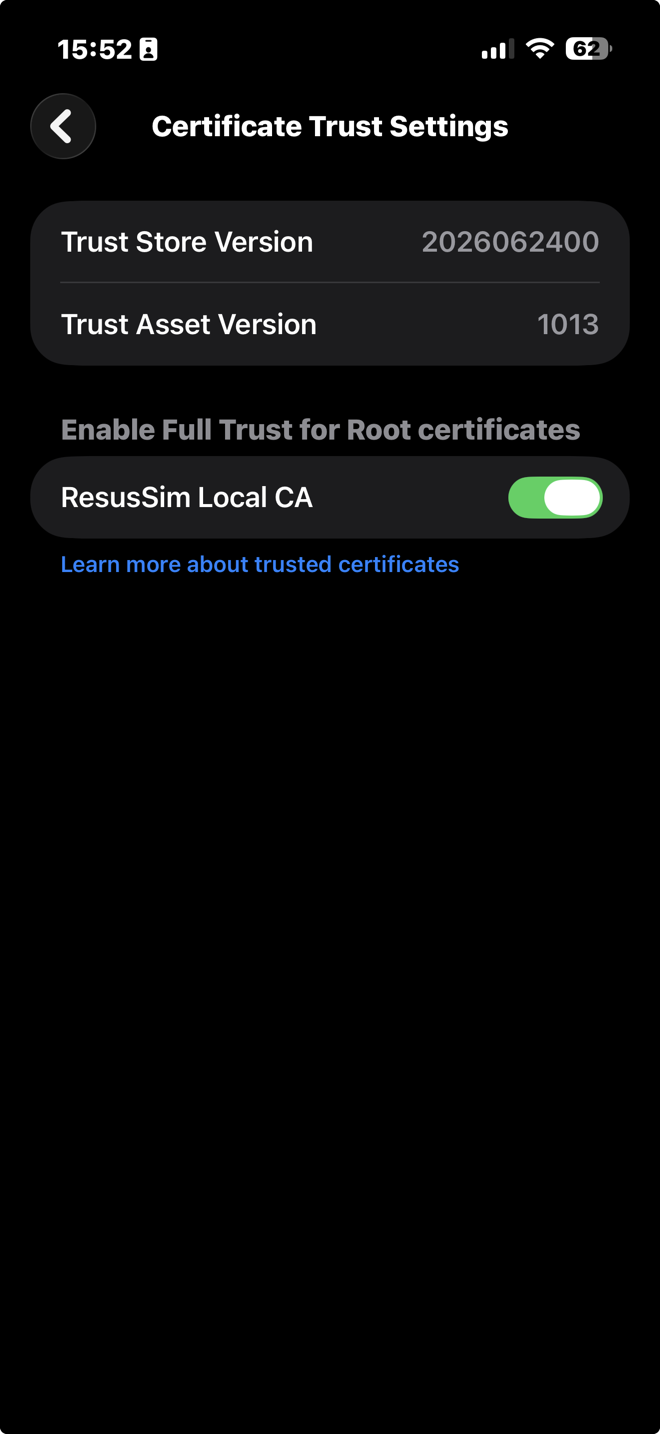
Full trust enabled — this is what actually makes it work. - Open
https://<host-address>:4443in Safari. No certificate warning = done, forever. (The pairing QR always uses the standard address — the app offers the secure one wherever a feature needs it.)
Mac a Mac joining as a display / recorder
The host Mac itself needs nothing — this is for an additional Mac joining the room.
- Download the certificate:
http://<host-address>:4000/api/tls/ca.crt - Double-click the downloaded ResusSim-CA.crt — Keychain Access opens and adds it to your login keychain.
- In Keychain Access, find ResusSim Local CA, double-click it, expand Trust, and set When using this certificate to Always Trust. Close the window and enter your password to confirm.
- Open
https://<host-address>:4443— no warning = done.
Windows PC Windows 10 / 11
- Download the certificate:
http://<host-address>:4000/api/tls/ca.crt - Double-click it → Install Certificate…
- Store location: Current User → Next.
- Place all certificates in the following store → Browse → Trusted Root Certification Authorities → Next → Finish → Yes on the security warning.
- Open
https://<host-address>:4443in Edge or Chrome — no warning = done.
Firefox keeps its own certificate store: Settings → Privacy & Security → Certificates → View Certificates → Authorities → Import → tick "Trust this CA to identify websites".
Chromebook ChromeOS
- Download
http://<host-address>:4000/api/tls/ca.crt - Open
chrome://certificates→ Authorities → Import → choose the file → tick Trust this certificate for identifying websites → OK. - Open
https://<host-address>:4443— done.
A Chromebook running the EMR or a wall display doesn't need this at all — plain http://<host-address>:4000 works fine for screens.
If it doesn't work
- iPhone/iPad: installed the profile but still get warnings? You skipped the trust toggle — Settings → General → About → Certificate Trust Settings.
- Certificate Trust Settings shows no toggle at all? Then the profile was downloaded but never installed — go back to VPN & Device Management and press Install. This is what the screen looks like before the install:
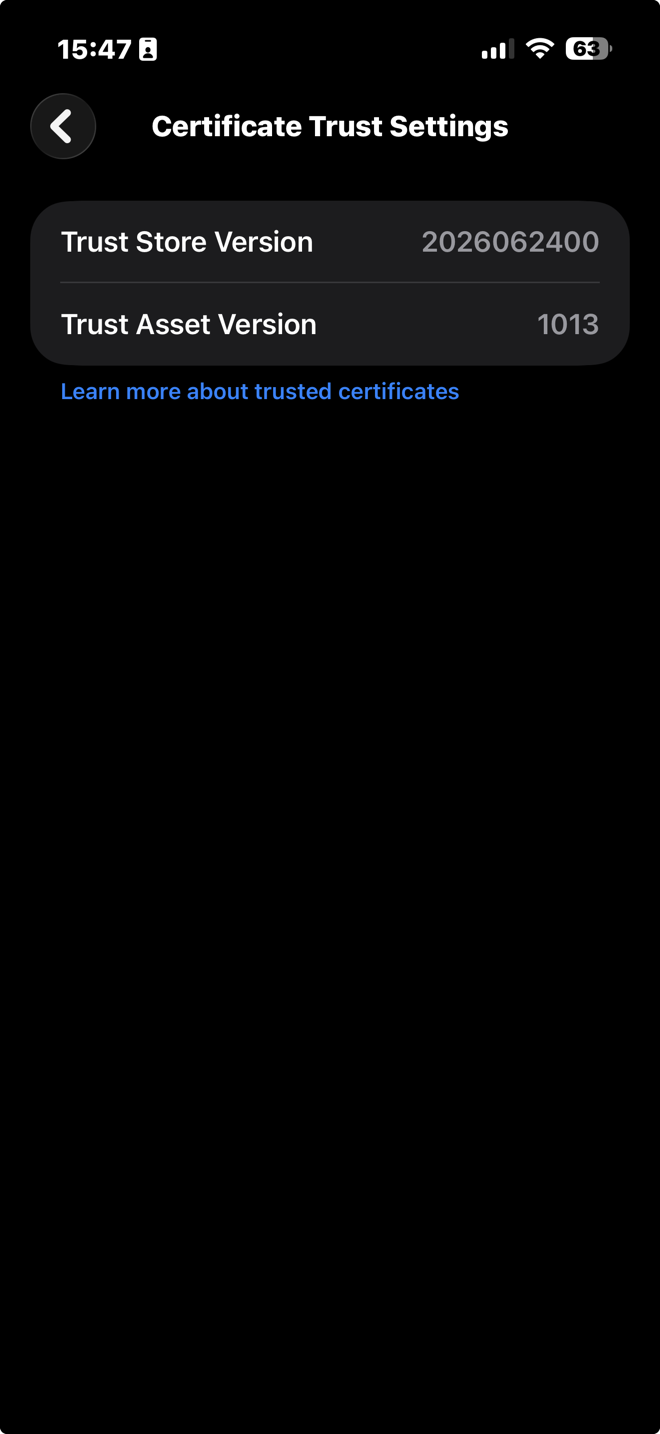
No toggle = nothing installed yet. - No "Profile Downloaded" appears? You downloaded it in Chrome or another browser. It must be Safari.
- Device can't reach the host at all? Same Wi-Fi network? VPN on the device? Host asleep? The host's Setup page shows the current address and a working QR.
- It worked last week, warns today? The host probably has a new network address — re-scan the QR from Setup. Your installed trust still applies.
- Removing it later: iOS: Settings → General → VPN & Device Management → profile → Remove. Mac: delete it in Keychain Access. Windows:
certmgr.msc→ Trusted Root → delete. It only ever trusted your own room's host.